One of the best things you can do for your business is promote it.
If you are putting out good content (a chocolate bar, raw cacao, research articles, books, videos, etc.), then once people are actually able to see it and lend you their attention, the market will reward you. Whether that means more sales, more views, or more in-person visits, doesn't matter. It won't happen overnight, but by consistently creating good content and sharing that content in ways that people want to consume it, then you'll be able to build a memorable brand for your company and connect with your consumers as much as you choose to.
The reason why Instagram is the best platform for chocolate marketing is because when people think of chocolate, they often have a picture associated with it before they have a sound, smell, or even a taste come to mind. What you want is for them to picture your chocolate or some chocolate that you've shared with them first. The key to making this happen is to dominate on one of your most visual platforms: Instagram.
Before you continue reading, please thoroughly absorb the material from Part 1 and Part 2 of the Chocolate Marketing 101 crash course.
Jump To
7 Tips for Taking Great Chocolate Pictures
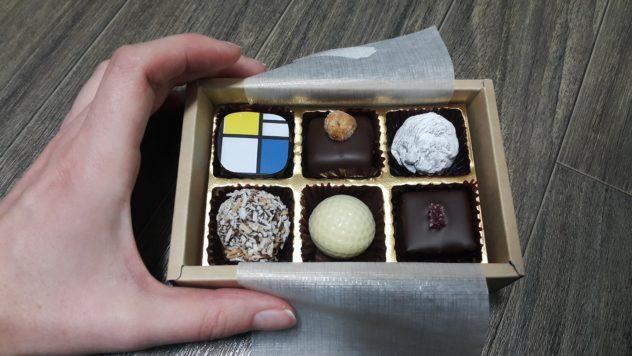
The first step towards improving your chocolate marketing is to focus on the overall aesthetic you're going for when making products, from the color & temper of the chocolate to the mold or shape design and the packaging. Your products should look good from all angles, and photograph well in all types of lighting (this means no holographics, silver, or gold!). As much as we want to ignore this fact, customers buy with their eyes first, and more & more of them are seeing your products online rather than in-store.
- Don't just snap photos of what's happening around you. Move stuff around or add to the setting, if need be. Just putting down a truffle and snapping a photo may be enough for an Instagram story, offering a sneak peek of new products or articles, but remember that you want to catch people's eyes.
- Imagine the photo before you take it— this allows you to notice those little things, like an imbalance of colors, not enough light, cut-off logos, etc. In photography it's said that the smaller the gap between the picture you imagine and the picture you actually take, the better you are. It may seem silly, but practicing this will allow you to gauge your improvement down the line.
- Make sure you have good lighting. I cannot overemphasize how important lighting is when taking photos, and natural is always best.
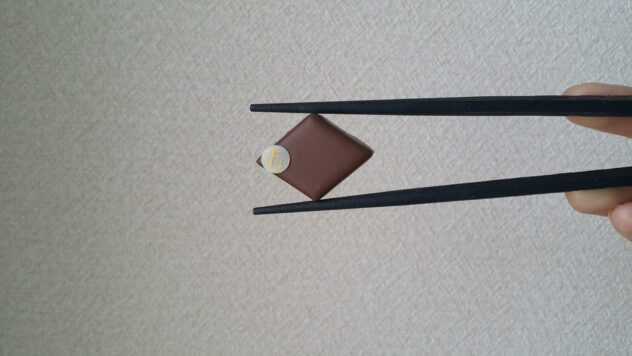
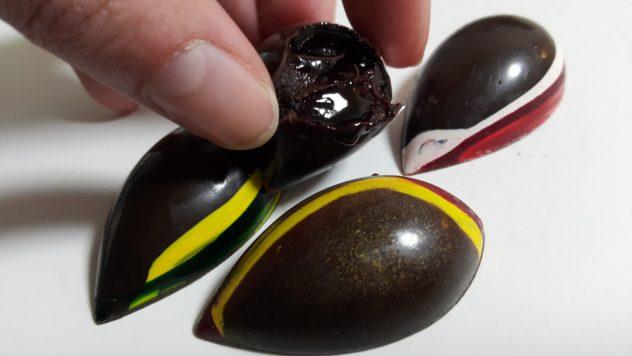
- Create focus on one aspect of your mold, truffles, coloring, etc. by zooming in on that element and allowing the rest of the photo to blur a bit. Embrace negative space (plain backgrounds, or large portions of blank space) and a lack of distractions as tools for this focus. Your photos don't always need to have a lot going on; they just need a story and enough light to read it with. If you're taking photos on a smartphone you can just tap and hold the screen on the part you want to emphasize.
- Add a human element, even if it's just a hand reaching for a bonbon. People subconsciously relate more to pictures with other humans in them (even if the whole body doesn't make it into the shot).
- Beauty always wins. If you have beautiful packaging and a beautiful bar, then share both, preferably in the hands of a happy customer.
- Shoot evergreen (timeless/ non-seasonal) content, and take way too many pictures. If you're on Instagram, you need to be on it, which means posting several times a week or once a day, as well as commenting on lots of people's pictures and liking them. This is a social network, so the more people recognize your name, the more likely they are to stop scrolling and tap on your profile, like your photo, and leave a comment. This could start a relationship that lasts as long as you choose to let it.
Pro-tip: if you're not yet confident in your own abilities as a photographer, intersperse beautiful re-grams from customers or clients into your feed and make them feel special about their own skills, while also showing the popularity of your offering. This is a win-win. Read more about the etiquette of & how to re-gram in this article from Wired.
Some chocolate instagrammers consistently taking great chocolate product pictures are: @thechocolatewebsite, @chokoladeoglykke, and @utopick_chocolates. And me (@damecacao). Just saying. See below.
Chocolate Marketing: Photo Ideas
Outside. A very popular pose is to just hold up a chocolate bar against a beautiful background. While this can be nice if you're in a very unusual place and want to convey a certain message— that your product's globally-liked, you travel to visit farmers, your cafe is gorgeous, etc.— more often than not, the background is massively distracting. So if you decide to shoot outside, it should be in the pursuit of natural light. Look for neutral backgrounds like a wooden table, blue sky, chair; a nice wall will do. Highlight the product or person that is the focus of the shot. Try to find natural props like flowers, interesting textures, and unique shadows.
Inside. Time is money, especially when you're running a business. Most people want to shoot product photos and quick Instagrams inside, but I urge you to still seek natural light. This will make your pictures look the most realistic and visually appealing with the least effort, and it allows you to build a small space in which to take the majority of your photos. As stated above, adding a human element to your Instagram feed will make it more relatable, so if you do choose to shoot inside, be sure to incorporate the people inside that place into your shots.
Some simple photo ideas you can use now are:
- off-center stacks of bars
- bonbons on a skewer (like a kebob)
- cacao beans in unexpected places
- broken bonbons in a long row
- "offering" anything in your hand
- a truffle next to an espresso
- Look at the #beantobar and see what catches your eye, then see how you can do your own versions of those photos. Remember that the story behind a shot can make or break its popularity, but it's not a necessary element for every single photo.
5 Basic Props to Invest In
Keep these around the cafe, factory, or house you're shooting your pictures in. You can use these to form the background and/or create different ambiance. Remember that when you're taking photos for Instagram, your audience is usually scrolling down their feed or looking at a certain hashtag for something interesting. Most people aren't searching for anything in particular, so you want to be the one to capture that wandering attention. Also be sure to use some of the decorations and beautiful surfaces you already have in your place to create recognizable elements when people finally visit in person. These are some of the tools that will help you do that.
- A plain cream white surface, even if that's just a giant piece of paper (as I use for some of my bar review pictures)
- A set of dull (read: not shiny) gold or silver flatware—knives, spoons, and forks— to add a touch of elegance, enhance the background, maintain a certain color scheme, or any other use you find for them.
- A wooden cutting board that you can use either in or as the background of shots, lending a different texture, surface, or visual element to grab attention.
- A plain flat white plate that could hold anything from a stack of bars to a line of bonbons or a child's messy-but-cute creation.
- 2-4 mugs in different colors. Even if your shop or brand doesn't sell any drinks, it makes sense to offer potential customers as many ways to use your chocolate as possible. Sending a bar into a hot milk bath or topping an espresso con panna with a bonbon is a great way to be both eye-catching and inspiring.
Writing Captions
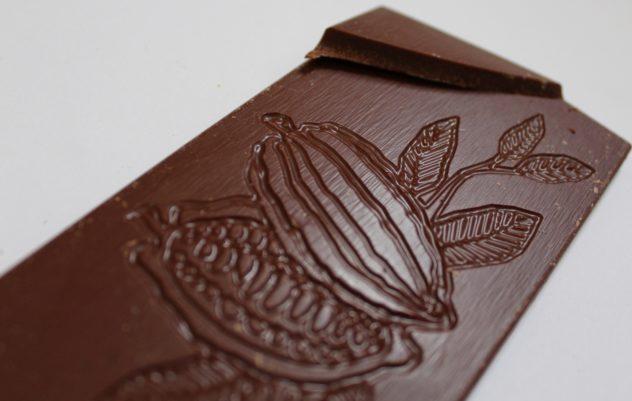
Recent literature (read: rumors) have said that long-form captions perform better on Instagram. Really, this makes sense if you consider that Instagram wants you to spend more time in the app. They want you to stop and read each post, staying engaged long enough to see more ads, so they're more likely to show you posts with long captions. As an added bonus, long captions allow you to convey more about your business, and allow your audience to connect with the humans behind the brand.
If Instagram is your only way or preferred way in which to connect with your audience or customers, then I'd highly recommend that you look at it as your story-telling platform.
This is the place in which you share anecdotes, tips, big news, and changes in the company. As the internet and its influence upon our lives continues to shift, your brand will be just as important as the product you're selling. So you want to make your brand relatable and memorable; when people think of good chocolate, they should think of you. Once you've gotten their attention with a well-planned & -executed photo, they'll glance down at the caption and this is where you'll hook them. Tell them a story they'll never forget, or at least one that will sit with them long enough for them to want to click on your profile.
Hook their interest for more than the three seconds it takes to like the photo, and you may have just gained another connection on this world wide web of ours. This connection is valuable because not only is this a person who might buy something from you and tell their friends to do so, as well, but they were hooked by the why of your business. Tell us who farmed the cacao you use, the number of hours it took to make that one bonbon, how you source the paper for your packaging, why you're based in your city, etc. Share all the little details you decided on and why you made those choices.
Make your Instagram a place of fun and memories and stories, so that with every caption they read, followers feel as if they've gained a little more insight into why your business does what it does. In the next installment of this series (coming August 2018), we'll go much deeper into how to craft an engaged Instagram audience rather than a mere following, including which hashtags to use.
What is IGTV & How to Use It
If you're not involved in the online marketing or blogosphere, you probably only know IGTV as just another feature on Instagram. But for those of us who work on these platforms for our living, we see IGTV as the Facebook-Instagram push back against Google-Youtube's domination over long videos. Instagram's previous video time limit was 1 minute, but this new feature add not only another space to play in, but it ups the time limit to 10 minutes (or an hour for verified accounts).
But what does this mean for your business?
Well, one option is to ignore it, or put up all the videos you have just to have a presence. Yet I'd recommend option 3: dominate on it. With now over 1 billion users, Instagram is one of the best platforms on which to shine, as well as one of the easiest on which to earn an audience. With potential customers able to find you through searching hashtags and names, many will find you through that function alone. However the way to go from being on defense to being on offence with chocolate marketing in particular is to lure them in with your product.
Chocolate has the rare appeal of being both appetizing and affordable to the masses. But what is it that makes what you do unique? Are your chocolates just beautiful, or are they delicious, too? The addition of IGTV gives you a space in which to create your own little TV show on a platform in which you already have followers. If you want to do a weekly recipe or look at your shop or updates on a project or visits to cacao farms or anything else you think followers would be interested in, now you have a place that's both organized and easily discoverable on which to share them. The best part? As of right now, just a week into the new feature, the sooner you use it then the more likely someone is to find your channel amongst the relatively few videos already posted.
Camera Recommendations
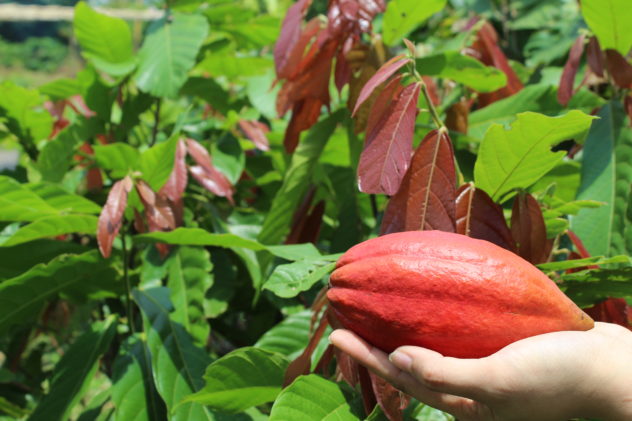
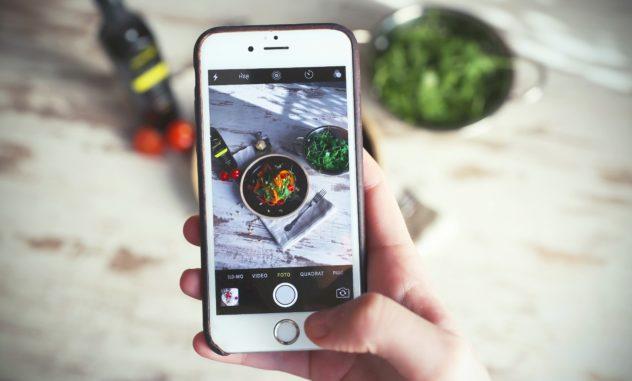
In this day & age, your smart phone is probably good enough.
I'm not going to try and sell you on a big camera or a professional photographer; playing around with the settings and really getting to know the tool you already keep in your pocket is probably just fine. It may even be great. But if you do want to take professional-level, or at least high-quality photos for your website, Instagram, Facebook, Pinterest, Twitter, etc., then I can tell you from personal experience that even the nicest smartphone camera won't cut it. With all of the features available on cameras that cost much less than your iPhone did, there's little reason not to invest in the aesthetics of your business.
If you want proof, go back and take a look at any of the photos from articles I posted before January 2018. Go ahead. Before January they were all taken with a smartphone, and the difference is truly striking. I won't recommend you anything that would take photos worse than a smartphone, but if you just happen to not have one or simply want a separate camera, these are some very highly-rated cameras (as told by both photographer friends and confirmed by customers on Amazon!).
$100 Recommendation
At just over a hundred dollars for a 20.1 megapixel camera, the basic quality of the photos taken will already be better than any smartphone on the market. This is the camera for someone not quite ready to invest in something larger or more complicated, but who still wants to take nice pictures of products. As a point-and-shoot camera with a good sensor, this is about as simple as it gets, but the quality is still high. Just don't forget to buy a memory card!
$200 Recommendation
With a price tag of just over two hundred dollars, this 20.2 megapixel camera may not initially seem to offer much more than the cheaper Sony above. But with 25x zoom ability and wifi capability, the Canon PowerShot will allow you to take faraway photos and send them right to your phone. Beyond the quick upload, the PowerShot also takes much better video by capturing more megapixels in each frame of the video. And just like the Sony, this is a point-and-shoot, so it's as simple as turning it on, focusing on the subject, and clicking away.
$400 Recommendation
Canon EOS Rebel T6 Digital SLR Camera
This is the price point at which you can smoothly transition from point-and-shoot cameras like the two above to ones with a few different moving parts. This exact same DSLR is actually the first one I got after my cheapo Lumix point-and-shoot finally bit the dust. I absolutely love this camera, too, though it's not the best for videos with subjects continually moving towards and away from the camera, as it can't auto-focus. But it has wifi technology and a detachable lens (if you decide to get more into photography, you can buy other lenses for other purposes), as well as a top-of the line sensor that will detect colors and capture them much better than either of the two cameras above, despite clocking in at just 18 megapixels.
$500 Recommendation
Strangely to those only basically familiar with photography, the megapixels only go down again; this Lumix has a mere 16 megapixels. Yet this is one of the best affordable cameras out there if you plan to be taking video along with photography. It features a flip-up screen for "selfies" or vlogging, as well as the highest video quality of any of the cameras on this list. If you plan on branching out into other social media platforms like Snapchat, Youtube, or Facebook, or even adding high quality videos to your Instagram feed, then this would be my pick.
$600 Recommendation
Clearly the most professional of all the cameras on this list, it may surprise some of you to learn that this is still considered one of the most beginner cameras on the market. But in terms of "beginner cameras," this is top of the line. 24.2 megapixels and 39 distinct focus points, along with wifi capability and a touch screen means it's got all the features with high approachability. Once you learn how to put on the lens correctly, you can easily use it like a point-and-shoot, but I'd recommend only buying this camera if you plan to learn how to use all its features. Like the other Digital SLR camera mentioned above, the Nikon will give you dozens of different settings to play around with and a very high quality video, but only invest in this if it's something you know you'll fully utilize.
Food Photography Tips
Assuming that your focus is on the chocolate and cacao, it would very much behoove you to spend an hour or two a day for just a week learning how to take better chocolate pictures. Whether you sell chocolate or the ingredients to make it, or even just write about it, you need to be able to photograph it. If your chocolate business shares no pictures of your chocolate on social media, then how are we supposed to trust that your chocolate is any good? This is just some literature and visuals to get you well-versed in the basics.
Books & Articles
The Serious Eats Guide to Food Photography // This is a much more in-depth guide to snapping quality pictures, and one of the most clear written guides I've ever come accross. If you're more into reading about a new skill and only have 15 minutes, I'd recommend reading through this.
How to Take Great Dessert Photographs // Sheri gets much more specifically inot taking better photos of desserts and other after-dinner treats here. She offers 13 tips that may stump a complete beginner, but which build well and reiterate key points from the Serious Eats guide.
Artificial Lighting Tips for Food Photography // Again, lighting is key to great pictures. If you learn gret lighting techniques, you have the ability to take great pictures (though I offer no guarantees that you actually will). Use ten minutes of your time to review lighting basics and maybe even learn a few new tricks along the way.
99 Food Photography Tips to Blow Your Mind // Honestly, many of these tips will go right over your head. But if you feel confident that you've nailed the basics and are looking for a few key take-aways to move up a level, read through and apply a few of these tips each day for a mont. I guarantee that half of them will be useless, but a half dozen will be a goldmine. If only a "99 Tips" video weren't so impossible to shoot.
Plate to Pixel: Digital Food Photography & Styling by Helene Dujardin // For those looking to build up not only a beautiful instagram and social media image overall, but also great product images for a website, press release, or cafe decoration, you're goign to want to invest in a book. Just as you likely have chocolate books dotting your home to refer back to, you'll want to have a photography book or two to use for inspiration and motivation. This book is focused on styling and creating the images you want to photograph, instead of just photographing what's there.
Food Photography: A Beginner's Guide to Creating Appetizing Images by Corinna Gissemann // Insofar as reference books for food photographers go, this is one of the best and most accessible for beginners. Corinna goes over how to use a DSLR camera, as well as food styling, lighting, props, and how to troubleshoot a photo that just doesn't look quite right. This is a book to keep right next to your camera.

Videos
Food Photography Basics: Light // Beginner Level // This is hands-down the best visual I've ever seen that explains the most basic element of food photography: lighting. In just 2 minutes, Genius Kitchen demonstrates and simplifies how you can manipulate light sources to take the photos you want, and it seems so obvious that once you see it you won't forget it.
Food Photography Tips with Andrew Scrivani // Beginner Level // I've taken Andrew Scrivani's CreativeLive course of food photography, and I love hearing how clearly he explains things. He uses the most basic terminology to explain things that you tend to use jargon for as soon as you learn the proper vocabulary. Basically, he's just a great teacher, and it's certainly worth 7 minutes of your time to learn these dozen or so tips (more small tips appear on screen, along with photo examples.
Food Styling For Stunning Food Photography // Beginner Level // A bit longer than the first two introductions to food photography, the crew at We Eat Together has put together more of a common mistakes-and-how-to-avoid-them for beginners. It goes into setting up pictures and moving around the various parts to get the focus where you want it. If you're looking to get a great overview of how to take product pictures in less than half an hour, I'd definitely recommend watching the first three videos on this list, and then going out and putting it into practice.
Food Photography for Beginners // Beginner-Intermediate Level // The title basically says it all. Josh and Alexa give you tips for both iPhone photography and DSLR photography (admittedly using a bit of terminology for the DSLR camera Josh uses). However, this is geared more towards someone who already dabbles in photography and wants to improve their skills with shooting food in particular.
6 ESSENTIAL Food Photography Props + REAL Photoshoot Examples // Beginner-Intermediate Level // Here Kelly goes into the food photography props I was mentioning above. You'll especially find value in this if you're looking into building a small space in which you consistently take your Instagram or chocolate marketing photos for other platforms. In a world in which new and unique photos are most highly valued, it pays to have a small arsenal of things which will help you achieve that new and unique look.
How to improve your food photography at home (without having to buy fancy gear) // Intermediate Level // Sean shares some insight into taking better photos in more home or cafe/factory settings, and he touches on gear, styling the food, setting up backgrounds, and manipulating light sources. I've linked the video so that it starts with the tips and skips his long-ish intro.
Read Part 4 HERE.
Don't forget to follow me on Instagram!
If you found this article helpful, please pin it for later!
Please tell me below, what was your main takeaway from this article?







Comments
No Comments